 how-to
How to Cast a Fly Rod Correctly: A Beginner's Guide
Table of Contents
- What You'll Need Before You Start
- Grip and Hand Placement for Fly Rod Control
- Understanding the D-Loop and Loading the Rod
- The Backcast Motion and Forward Cast Stroke
- Fly Casting Timing and Rhythm for Smooth Delivery
- Common Fly Casting Mistakes to Avoid
- How to Practice Fly Casting at Home
- Casting for Distance vs. Accuracy
- Frequently Asked Questions
Last Updated: September 21, 2026
What You'll Need Before You Start
Before you start learning how to cast a fly rod, gather basic equipment: a fly rod, reel, fly line, leader, tippet, and flies. You can begin with modest gear and upgrade later as your skills improve.
Start with a medium-action rod in the 8 to 9-foot range for most freshwater situations. A weight-forward fly line makes casting easier for beginners.
Many outfitters offer rental equipment so you can test fly fishing before buying your own gear.
Grip and Hand Placement for Fly Rod Control
Hold the rod with your dominant hand on the cork handle, thumb on top, with your index and middle fingers underneath and ring finger and pinky providing support.
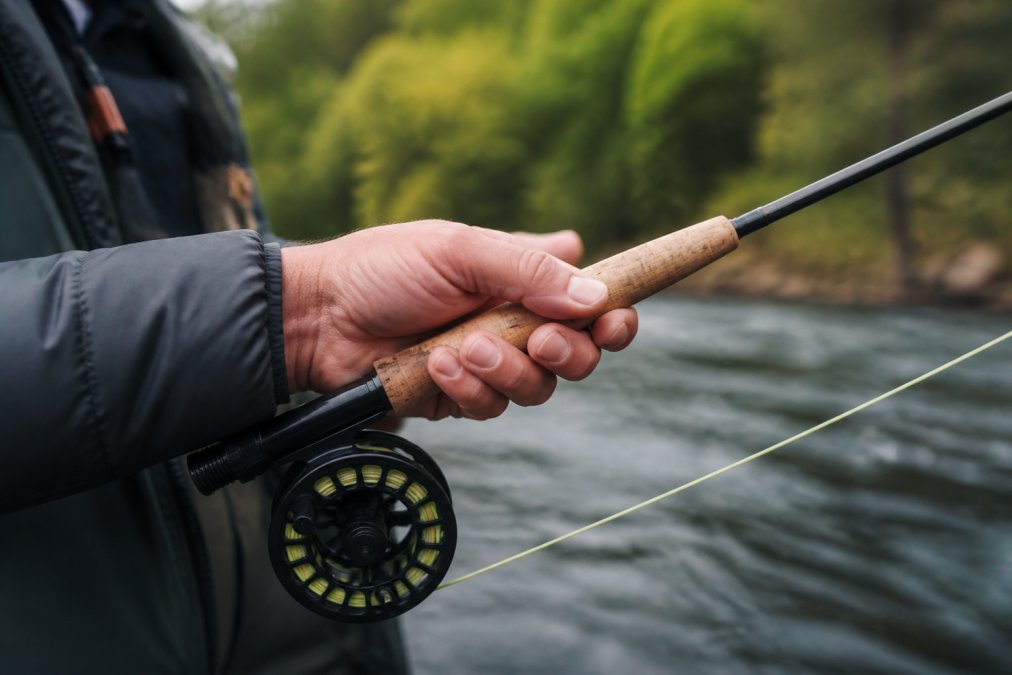
Your non-dominant hand holds the fly line lightly between thumb and index finger to manage line control. Keep your grip firm but relaxed; tension tires your arm and reduces distance.
Position your elbow at roughly 90 degrees to your body with your forearm moving in a vertical plane for maximum control.
Understanding the D-Loop and Loading the Rod
The D-loop is the D-shaped curve your fly line makes during the backcast. Learning to recognize D-loop shapes helps you diagnose and fix casting problems.
Loading the rod means bending it to store energy. The rod flexes during the backcast and straightens to propel your line forward.
Accelerate the rod tip smoothly during the backcast and stop at the 1 o'clock position. Faster acceleration creates more load, line speed, and distance.
Recognizing a Healthy D-Loop
A proper D-loop should form behind you during the backcast with these characteristics:
- Shape: The loop resembles the letter D, with a smooth, rounded curve on the outside edge and a relatively straight line on the inside.
- Size: The loop should be large enough to contain all your fly line without crowding. A loop that's too small indicates insufficient rod loading or weak acceleration.
- Separation: The loop should remain open and separated from your body. The line should not drift toward your head or torso.
- Timing: The loop should form completely before you begin your forward cast. If it collapses or flattens before you're ready to cast forward, your pause is too long.
Diagnosing Common Loop Problems
Tailing Loop, Your forward cast line crosses over itself, tangling your line. Cause: Stopping the rod too abruptly or accelerating too late. Fix: Decelerate gradually as you approach 10 o'clock and accelerate smoothly throughout the forward cast.
Slack Loop, Your D-loop collapses and your forward cast lacks power. Cause: Insufficient backcast acceleration or too long a pause. Fix: Accelerate more decisively from 10 to 1 o'clock and shorten your pause so the line is still moving when you begin the forward cast.
Asymmetrical Loop, One side of your D-loop is larger, causing drift and poor accuracy. Cause: Rod tip moving off the vertical plane. Fix: Keep your forearm vertical with your elbow at 90 degrees, moving only up and down.
Convex Loop, The outside curve bulges outward, creating an inefficient loop. Cause: Slow acceleration at the start, then too hard at the end. Fix: Use smooth, consistent acceleration throughout the backcast.
The Backcast Motion and Forward Cast Stroke
The Backcast Phase
Move the rod tip smoothly from 10 o'clock to 1 o'clock in about one second. Accelerate smoothly throughout, don't jab or punch. Stop abruptly at 1 o'clock to anchor the backcast.
Pause briefly to let the fly line straighten behind you. More line requires a longer pause. Develop a feel for when the line has straightened to time your forward cast correctly.
The Forward Cast Stroke
Move the rod tip from 1 o'clock to 10 o'clock with smooth acceleration, applying maximum speed near the end. Stop abruptly at 10 o'clock to transfer energy to the line. Let your rod tip drop slightly as the line extends.
Fly Casting Timing and Rhythm for Smooth Delivery
Timing is everything in fly casting. Count "one Mississippi" for backcast acceleration, pause, then "one Mississippi" for the forward cast to develop consistent rhythm.
The pause between backcast and forward cast is critical. Pause too short and the D-loop collapses; pause too long and the line falls. Practice finding the right pause length for different distances.
Common Fly Casting Mistakes to Avoid
Beginners make predictable casting mistakes. Learning to spot these errors in yourself speeds up your improvement.
Rushing the backcast, Creates slack and no rod load. Accelerate smoothly instead. Not stopping the rod, Ruins timing. Stop abruptly at each endpoint. Wrist break, Changes rod angle. Keep your wrist straight. Gripping too tightly, Makes casting jerky. Relax your grip. Poor follow-through, Disrupts line extension. Let your rod tip drift down naturally. False casting too many times, Tires your arm. Two false casts are usually enough.
How to Practice Fly Casting at Home
You don't need a river to improve your casting. A yard or parking lot works perfectly for practice. Many fly casting experts recommend practicing at home to build muscle memory. However, fly casting is a repetitive motion that can cause strain injuries if practiced incorrectly. Smart practice protects your body while accelerating your skill development.
Setting Up Your Practice Space
Find a flat area with at least 30 feet of open space. Mark a target on the ground with tape or chalk. Start with short casts to the target. Focus on smooth rhythm and proper form.
Practice without a fly first. Use a small piece of yarn tied to your leader instead. Yarn lets you see your line clearly. You can watch the D-loop form and observe your casting mechanics.
Ergonomics and Injury Prevention
Fly casting places repetitive stress on your shoulder, elbow, and wrist. Improper technique or overtraining can lead to tendinitis, bursitis, and other overuse injuries that sideline you for weeks.
Body Positioning, Your casting arm should move in a vertical plane with your elbow at roughly 90 degrees to your body. Your shoulder should remain relaxed and level; don't hunch or rotate your torso excessively. Your feet should be shoulder-width apart, with your weight balanced. This stance distributes the casting load across your whole body instead of isolating your shoulder and arm.
Wrist Stability, Keep your wrist straight throughout the cast. Your forearm does the work, not your wrist. Bending your wrist during the cast creates stress on the tendons in your forearm and wrist. Over time, this leads to repetitive strain injury. If you feel wrist pain or fatigue during practice, stop immediately and rest.
Warm-Up and Cool-Down, Always warm up before casting. Spend 5 minutes doing arm circles, shoulder rolls, and gentle forearm stretches. This increases blood flow and prepares your muscles for repetitive motion. After practice, spend 5 minutes stretching your casting arm, shoulders, and neck. Hold each stretch for 20 to 30 seconds.
Practice Duration, Limit practice sessions to 20 to 30 minutes, especially when you're learning. Your arm tires after this duration anyway, and continuing past fatigue increases injury risk. Fatigued muscles can't maintain proper form, which leads to compensation patterns and strain. Short, focused sessions beat long, tired ones. Three 20-minute sessions per week is more effective and safer than one 90-minute marathon.
Rest Days, Take at least one full rest day between casting practice sessions. Your muscles repair and strengthen during rest, not during the activity itself. Casting every single day without rest increases overuse injury risk significantly. If you feel persistent pain (not just muscle fatigue), take extra rest days and consider consulting a physical therapist.
Load Progression, Start with short casts and gradually increase distance over weeks, not days.
Structured Practice Drills
Work on one element at a time. Spend one session on backcast timing. The next session focus on forward cast acceleration. Breaking casting into parts helps you master each phase without mental or physical fatigue.
Tracking Your Progress
Keep a simple practice log. Note the date, duration, what you worked on, and how you felt. Track any soreness or fatigue. Over time, you'll see patterns, which drills improve your casting most, and which practice durations leave you feeling strong versus exhausted. This data helps you optimize your training.
Casting for Distance vs. Accuracy
Distance and accuracy require different techniques. Understanding the difference helps you choose the right approach for each situation.
Frequently Asked Questions
What are the most common fly casting mistakes beginners make?
The most frequent errors include breaking the wrist too early, using excessive force, and failing to pause between the backcast and forward cast. Many beginners also neglect the non-dominant hand's role in controlling the line. These mistakes create slack in the fly line and result in poor loop formation. Focusing on smooth acceleration and a proper stop at the end of each stroke corrects most casting problems quickly.
How long does it take to learn proper fly casting technique?
Most beginners grasp the fundamentals of how to cast a fly rod correctly in a single day of focused practice. However, developing consistent, smooth casting rhythm and accuracy takes several outings on the water. The key is understanding the mechanics of the D-loop and loading the rod, then repeating the motion until muscle memory develops. Professional instruction accelerates this process significantly compared to self-teaching.
Can you really improve your fly casting at home without a river?
Yes. Practicing fly casting at home in a yard or open space builds muscle memory for grip, timing, and stroke mechanics without requiring water. Use a casting pool, lawn, or parking lot with plenty of space. Practice false casting to develop rhythm and line control. However, presenting to actual fish and reading water conditions requires on-water experience that home practice cannot fully replicate.
What role does the non-dominant hand play in fly casting?
The non-dominant hand controls line management and stripping, which directly affects casting distance and presentation. It pulls line to load the rod during the backcast and manages the fly line's tension throughout the casting cycle. Neglecting this hand results in weak casts and poor loop shape. Coordinating both hands creates the smooth acceleration and stop needed for consistent, accurate fly casting.